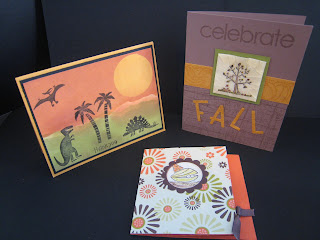
Stay tuned for full views of the cards as well as card number 5! It isn't special just hasn't been created yet! :-) Remember to RSVP before November 23rd to get the discount! RSVP by November 28 to ensure you have a spot! Space is limited! If this day does not work please let me know and I can arrange a make up date so you don't have to miss these awesome cards!
Tuesday, October 28, 2008
Coming Soon...Christmas Card Stamp a Stack
Gift Cards
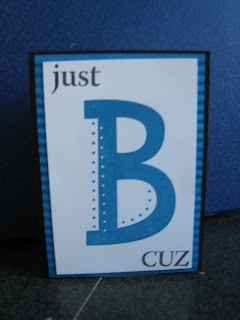
This one is a case from a card I created a while back. I love the colors Basic Black and Tempting Turquoise together. I used the crimper on the turquoise piece to give it some texture.
I just got this set recently and love it already. It is 20% off this month with a purchase of $20 to celebrate Stampin' Up!'s 20th anniversary. The colors used were Real Red, Ballet Blue, Summer Sun and Whisper white. The inside cupcake is from the Sock Monkey set!
Bugs and Kisses Swap!
Stamps: Bugs and Kisses, Sanded
Ink: Apricot Appeal, Brocade Blue, Rose Red
Paper: Apricot Appeal, Brocade Blue, Rose Red
Accessories: 1 3/8", 1 1/4", 1", 3/4" circle punches, markers, rose red 1/4" grosgrain ribbon
Club Projects!
Here are the two projects my club completed on October 16th. This club meets on the third Thursday of each month. If you and 5 of your friends want to start a club let me know, new clubs will start in February! Now on to the projects!
Stamps: Harvest Wheel
Paper: Pumpkin Pie, Whisper White, Old Olive, Creamy Caramel, Really Rust, Watercolor
Ink: Chocolate chip, Black Stazon
Accessories: Markers, watercolor brush and water, sponge, 1/4" Chocolate Chip Grosgrain Ribbon
The lion uses the scallop circle (punched twice), 1", 1/2", 1/4", 1 3/8" circle punches, small oval punch, Boho Blossoms punch and horizontal slot. The eyes, dots on cheeks and claws were drawn with a chocolate chip marker. Saying and grass is from Inspired by Nature. Cardstock is Chocolate Chip, Old Olive, More Mustard and Whisper White. The grass was stamped in Mellow Moss to make it more subtle. Hope you like...if you want more detail on the lion feel free to ask. I am always happy to share what I love with you!!
Happy Stamping
Cracked Glass, Sunsets, and a tri fold wonder
I have to say I had a lot of fun coming up the designs for these cards. My favorite technique of the three was the cracked glass and I think my girls will agree. If you live nearby come join us! You learn three techniques, create the instruction cards as well as greeting cards with each technique. Class is $10 or $5 with a $25 purchase. We meet on the third Tuesday of each month. RSVP the Sunday before!
I used the Crab and Company Set since it is 20% off this month with a $20 purchase. The paper is Hawaiian Papaya, Chocolate Chip, Tangerine Tango, Kiwi Kiss and Whisper White. We used the scallop circle punch, 1 3/8 punch, 1 1/4 punch and the slit punch. The ribbon is the awesome 1/4" Chocolate Chip Grosgrain (I am so glad they brought this one back!)
This technique is a lot of fun! If you are a bubble wrap popper than you are going to love this technique. I stamped the tree from A Tree From All Seasons (on Dormant list for $12.95) and colored it. Now the fun part...Smoosh your versamark pad over the whole image, pour on Glossy Glaze Embossing Powder and heat. Let cool and repeat about 4 times. Once you have done this four times put it in the freezer to cool it super fast. Paper will buckle but no worries. When you pull it out start to bend it slowly and watch it crack. If the paper tears you can always reheat the glassy glaze over the part and cool again. Sponge over image with Cocoa or Chocolate chip ink, wipe off and the cracks should be distressed. A very cool looking technique. The letters are done using the big shot Go Go Boots Alphabet. I wheeled over the scraps with the Harvest Wheel to give the letters some dimension.
Stamps: Sanded, A Tree For All Seasons, Harvest Wheel, Celebrate Everything
Ink: Close to Cocoa, versamark
Paper: Close to Cocoa, More Mustard, Old Olive, Very Vanilla
Accessories: Big Shot, Go Go Boots Alphabet, Earth Elements Markers, Sponge
Technique Tuesday!
Accordion Fold
This first card is an accordion fold and a lot of fun to create. You take a 4.25 x 11 piece of cardstock and score it at every 1 3/8 inch. Add your squares and you are done. You can find more info about where I got the idea here. A little further down on my blog posts.
Paper: Old Olive, Close to Cocoa, Really Rust, More Mustard, Chocolate Chip and Very Vanilla
Ink: Basic Black
Accessories: Water color crayons, blender pen, small oval punch, sticky tape
Rolling Marble Technique!
This technique makes you feel like a kid again. It can be messy but a lot of fun! I used Old Olive, Really Rust, and Pumpkin Pie reinkers in three different plastic stamping boxes. Add the marbles and roll the ink around to get the marbles good and covered. Add a piece of cardstock (I taped mine to the lid) and roll the marbles over the cardstock until you get the desired look. When done just rinse the boxes and marbles out in the sink and let dry!
Paper: Old Olive, Naturals Ivory, Pumpkin Pie
Ink: Old Olive, Chocolate chip, Pumpkin Pie, Reinkers (Old Olive, Pumpkin Pie and Really Rust)
Accessories: Big shot and Top Note Die, Large Oval Punch, Boho Blossoms punch, sponge, key tag punch, 1/4" Pumpkin Pie Grosgrain Ribbon
This was a lot of fun but I learned that the light table did no good on a dark piece of cardstock. I cased the idea for this card somewhere and added the dry embossing. It has to be one of my most favorite cards so far!
Stamps:Eastern Blooms
Paper: Riding Hood Red, Chocolate Chip, Very Vanilla
Ink: Riding Hood Red
Accessories: Chocolate Chip Marker, Blender Pen (to get the red ink off the stamp), Embossing Stylus, Embossing Template Floral Frenzy, Linen Thread
Saturday, October 25, 2008
Punch Art and another Halloween Project
I have fallen deeply in love with my punches!! I am having so much fun using them here lately. Thank you to all of you out there that have contributed to this addiction! :-)
The first project is from the catalog...A cute broom stick bag, which is filled with candy! I do not have any Halloween stamps so I used my punches and Big Shot Go Go Boots alphabet to create this fun tag! I got the eyeball idea from a blog and decided to do a tag. Circle punches, white gel pen, and an only orange marker.
How cute is this little guy? Again, I got him from a wonderful lady on splitcoast. I haven't really used my photo corner punches until now. I warn you...this little guy is so cute and is so fun to create, you may make hundreds! Another idea I saw with him was to put a sucker between the scallops with the stick pointing up.
Another playing with punches project. I have not done anything with this yet. I used oval punches, circle punches, horizontal slot punch to create this cute cauldron. You could also do this with gold to create the pot of gold.
Here are some fun critters I punched, laminated and put a magnet on the back! The turtle I think is my favorite. He uses circle punches, word window punch and horizontal slot punch.
Here is the lot of them. I sold some of these guys at a craft fair last weekend for a $1 each. I have some more available and can create more so email me if you would like some!
Till next time! Happy punching!
Just Jawing...
I am not a huge fan of this set or even Halloween but do have to say I had fun stamping this bag. We stamped in versamark on black paper and embossed in silver. We got the instructions from Inking Addict.
Fill with candy and give to a friend....or fill with goldfish, teddy grahams or something more healthy and give to the kiddos at school, church or daycare.
Happy Stamping!
Saturday, October 18, 2008
My baby turned FOUR!!
If you would like me to create your child's invitations or invitations for any event contact me today for prices. The possibilities are endless..baby showers, wedding showers, birthday, anniversary parties....the list goes on.
More projects coming soon....I had a craft fair today and have had a lot of classes this month so stay tuned!